Making old drawers glide with homemade furniture wax
Furniture wax is great for restoring and preserving the natural beauty of plain wood. It's not necessarily great for protection -- polycrylic or polyurethane top coats are the winners for durability. However, I recently found a great use for it -- making old wooden drawer slides glide like new again.
I learn most of what I know about furniture by watching Youtube videos, and I've seen people apply furniture wax to the inside and sides of wooden drawers to refresh them. I was working on a dresser, so I wanted to try this -- but a tin of furniture wax costs about $15. I didn't really want to spend money trying out a minor upgrade that would probably go unnoticed by most people.
At the start of every month, I go through all my purchases in the previous month and tally them up into different categories. Last month (March) was when I started my furniture hobby (see my first project here), and I spent $280 on that alone. A lot of that was start-up costs for supplies that I'll be able to continue using for a long time before having to buy again (brushes and rollers, sandpaper, nails/screws, big cans of primer/paint/stain/top coat). I also started my gardening and house plants hobby, which was another couple hundred bucks. And my cat got sick, which was over $2,000 in vet bills because I freaked out and put her through a lot of diagnostic tests. (She's fine now, and the tests were inconclusive 🤷♀️) And we've been paying double mortgage/rent since the move, although March was the last month we had to endure that.
Generally I try not to buy a lot of things -- last year I saved over 55% of my post-tax income! (Thank the pandemic.) But moving to the new house has spurred a lot of spending. I also hadn't actually sold any furniture pieces yet. The one listing I had up had been sitting on multiple sites for weeks with no buyers.
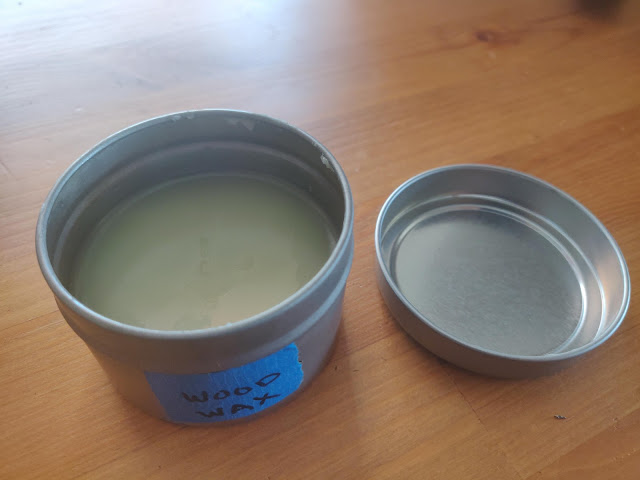
So anyway, time to make my own furniture wax, for the low cost of $0. I made it only using things I already had at home: a reused empty candle tin, the remnants of a beeswax candle, and grapeseed oil.
I love candles, and my brother got me a yearlong candle subscription last year. I burned them all to the bottom and cleaned and saved the empty candle jars because I'm a hoarder that likes to keep nice containers. One day I'll use them for my own homemade candles... one day. One of the candles came in a metal tin that looks just like the tins that furniture wax comes in, so it was perfect for this.
Again because of my love of candles, my friend got me a locally made beeswax candle as a housewarming present when we moved to the new house.
All good things come to an end, and eventually I burned this guy all the way down, leaving a donut-shaped remnant of beeswax behind. I saved it, not knowing what I would use it for, just because it was such a good candle and I didn't want to toss quality beeswax. This was a couple months ago.
There's no better feeling than hoarding something that actually ends up being useful! I put the candle remnant in my empty candle tin, and gently melted it in a steamer with the lid on.
For one part melted beeswax, I added three parts grapeseed oil. Pretty much any oil will do. I used grapeseed oil because my mom sent me a big jug of it that I almost never use since I prefer olive oil for cooking. It's good for seasoning my cast iron pans because compared to olive oil, it has a higher smoke point and won't go rancid or smell. So I guess now I'll also use it to "season" my wood furniture.
After adding the oil, I kept the tin over heat for a while longer and stirred everything together. Then I took it off to let sit and cool down. This would have been the time to add some essential oils for scent, but I decided to keep it neutral.
The result is a pale, soft wax with a lip-balm like consistency and slight honey scent. There's also still the very faint scent of the candle that used to be in the tin.
I applied this to the drawers and was frankly unimpressed. I guess the wood wasn't that dried out to begin with, or maybe it had been previously finished, because there wasn't really a visible difference. The wood did feel a little smoother, but people don't usually caress the sides of their dresser drawers, so I didn't bother finishing the rest of the drawers.
Adding wax to the wood slides, however, was great. Modern furniture has nice metal rails that drawers glide across using plastic wheels or near-frictionless ball bearings. (See Isaac's cheapo broken desk below -- note the wheels on the front.) Older furniture uses wooden tracks or rails that the drawers slide over. This results in some wood-on-wood friction that gets more noticeable as the wood ages and dries out.
Unlike the actual body of the drawers, I saw a visual difference when I applied wax to the wooden rails. It became a darker, more hydrated-looking color. I assume this is because the rails were raw untreated wood, whereas the drawers were probably not. Even though the drawers on this dresser weren't particularly hard to open to begin with, they felt noticeably smoother after applying the wax.
The really impressive part was when I used this on a wooden desk drawer. This drawer was definitely a little "sticky" -- you couldn't pull it all the way open with one tug. Instead you had to kind of shuffle it out with both hands. One application of wax later, it was effortlessly gliding open and closed. Viola ✨


Comments
Post a Comment